Moving on from Arduino, this week we learned how to use Unity and Vuforia to create augmented reality (AR). The process is quite complicated so it is important to follow each step one by one.
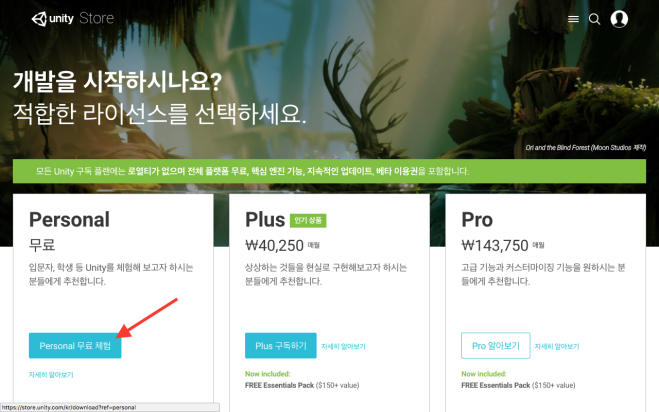
- Download Unity
– Unity for personal use is free.
– During installation, make sure to check boxes for all relevant additions. (Mac users check IOS-related ones. MUST check Vuforia.)
– Need to make an account or connect with Google/Facebook to access Unity.
- Create a Developer’s Account for Vuforia
– To do this, visit the Vuforia Developer Portal.
– Click “Register” on the top right corner of the page and create account.


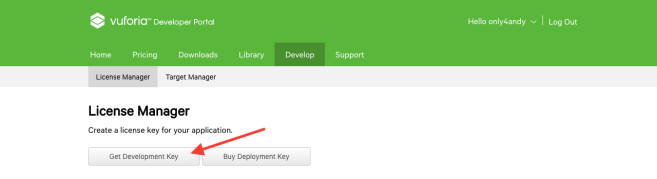
- Create License Key for Application
– Click on “Get Development Key”.
– Name the license key whatever you want, check the box and then click “Confirm”.

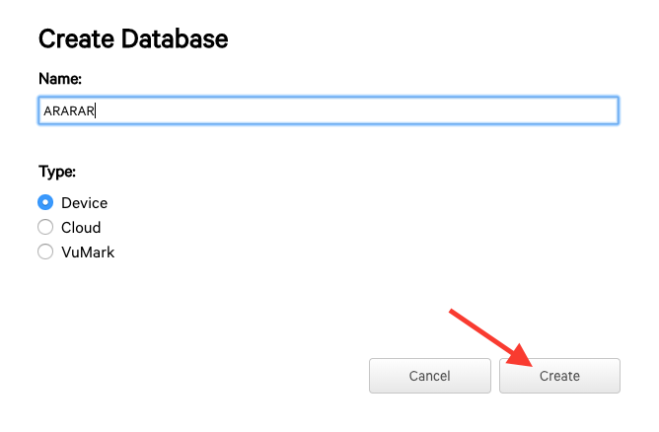
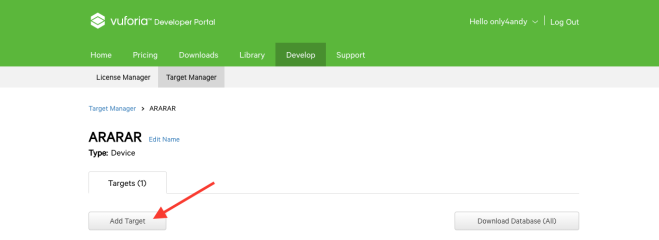
- Afterwards, click on “Target Manager” and add database
– Click “Add Database”, name your database whatever you want, set type as “Device” and then create.

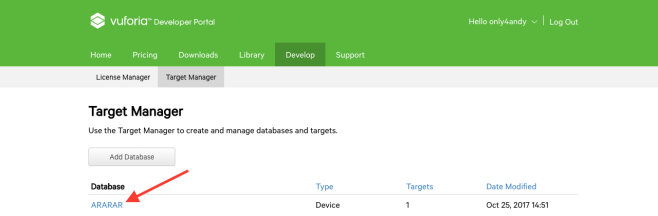
- Add Target
– Click on the newly made database (in this case ARARAR).
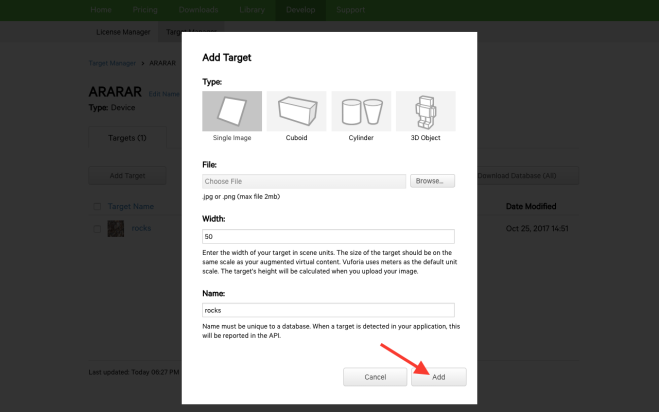
– Press “Add Target” and upload an image.
– For maximum usability, make sure that the image is in JPEG format, RGB color and is less than 2MB.
– Set the width as 50 (does not really matter but 50 is a good number).
– Name it whatever you want and then click “Add” (in this case I named it rocks).

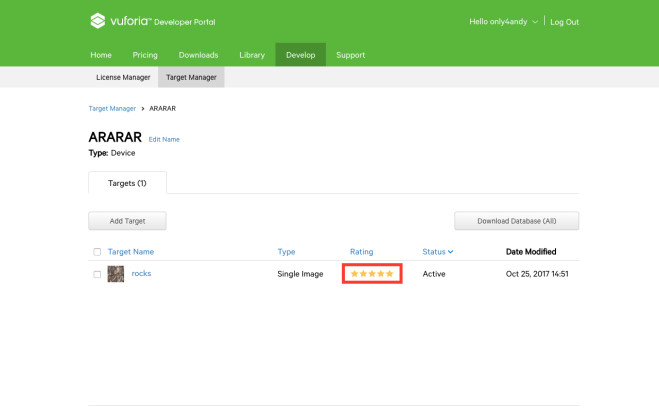
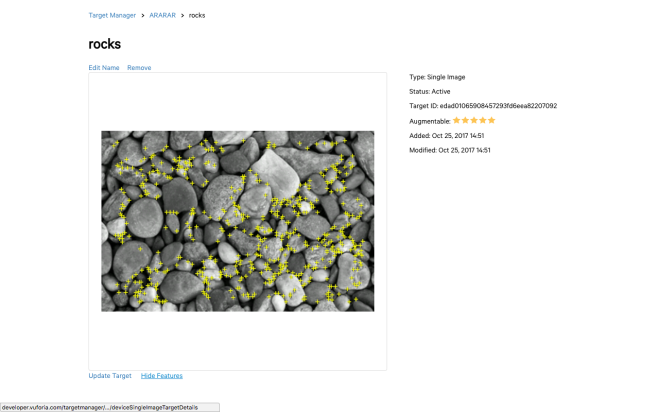
- Double Check the Target
– For maximum experience, make sure that the image rating is 5 stars.
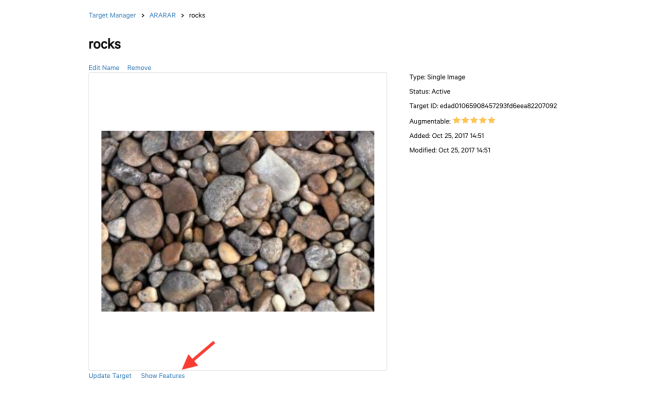
– Vuforia prefers high contrast images, so click on the target, press “Show Features” and see if the image has many yellow dots (indicating that it is high contrast).
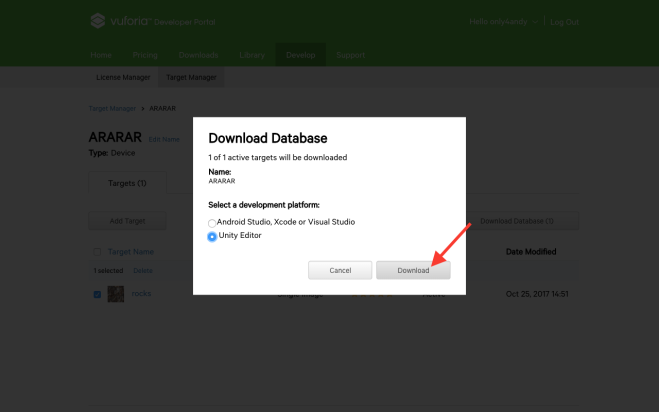
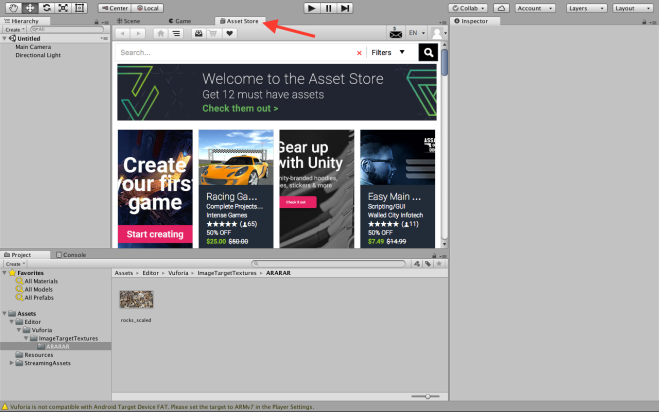
- Download Database
– Select target and click “Download Database”.
– When downloading, make sure to set the development platform as “Unity Editor”.
– It will be downloaded as a Unity Package.

Now moving on to Unity…!
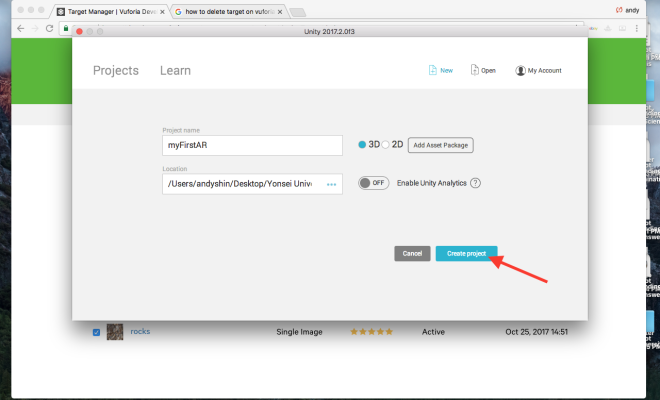
- Open Unity and Create a New Project
– Make sure to set the project as 3D and to disable unity analytics.
– You are creating a folder, not a single file!


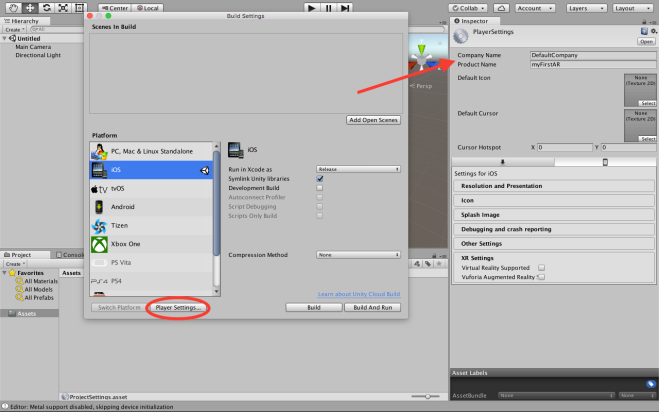
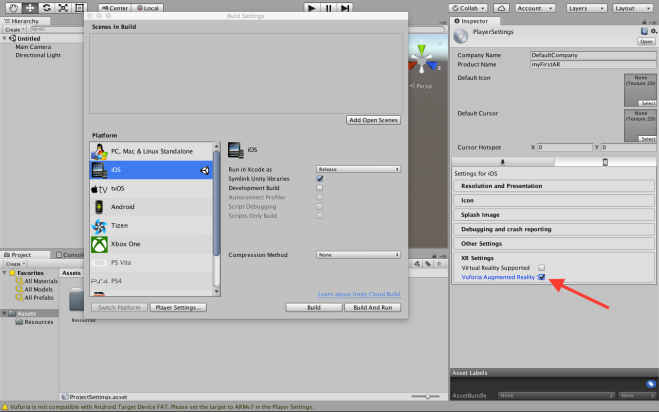
- Switch Platform
– Go to File → Build Settings → IOS → Switch Platform.
– Make sure to check “Symlink Unity libraries”.


- Change Player Settings
– After switching the platform, click on “Player Settings”. This will reveal a tab on the right.
– Set “Company Name” and “Product Name”.
– Go to “XR Settings” at the bottom of the tab and check “Vuforia Augmented Reality Supported”.
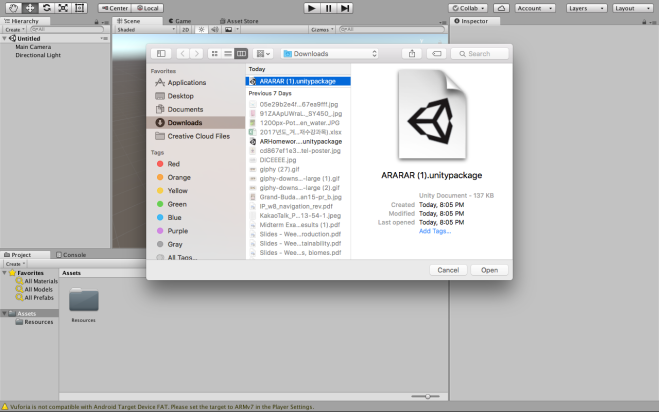
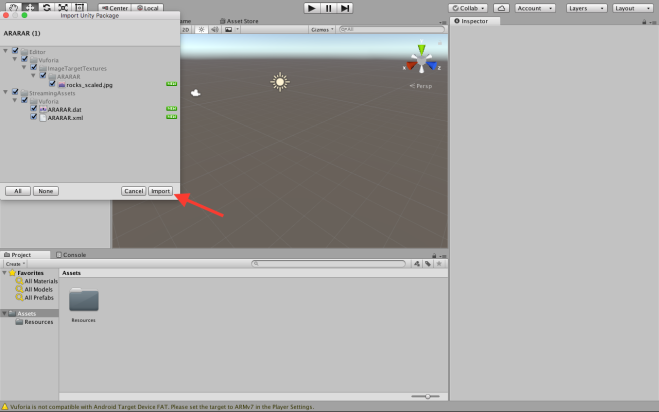
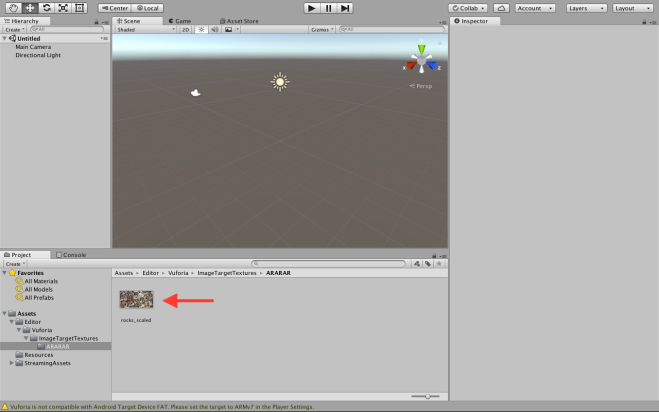
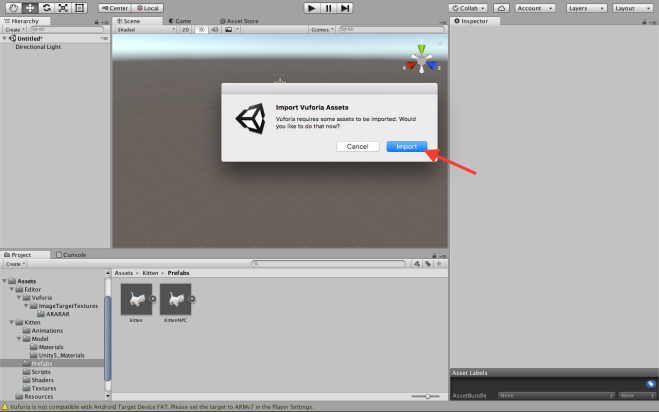
- Import Image Database Package
– Close the “Build Settings” window.
– Go to Assets → Import Package → Custom Package.
– Select the pre-downloaded image database package and import.
– Make sure that the package components are present (e.g. the image uploaded).
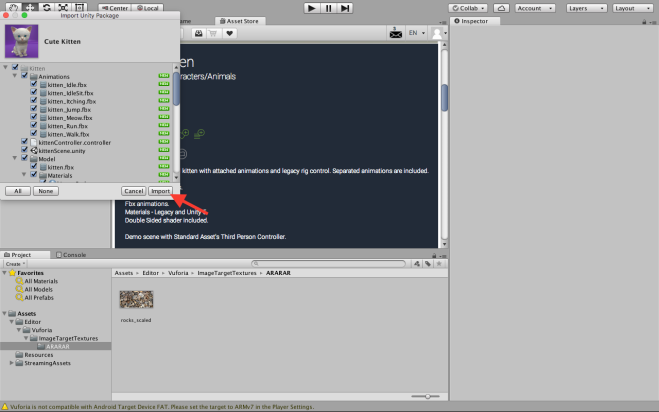
- Download 3D Model
– Click “Asset Store”.
– Search / Filter for a 3D model you want to use and import it (In this case, we used “Cute Kitten”).
– Click “Import” once more when a sub-window pops up.
– After the 3D model has been imported, make sure that all the components are present.

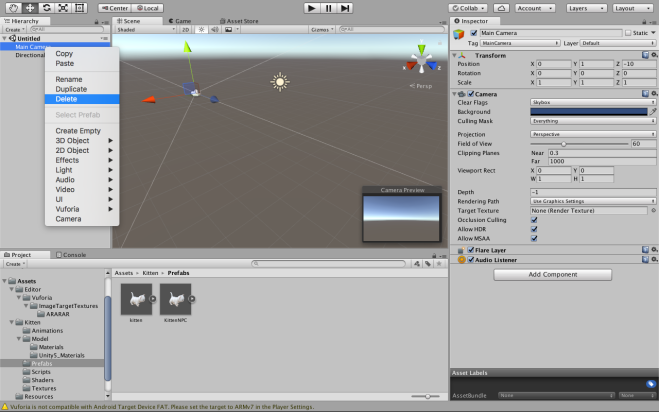
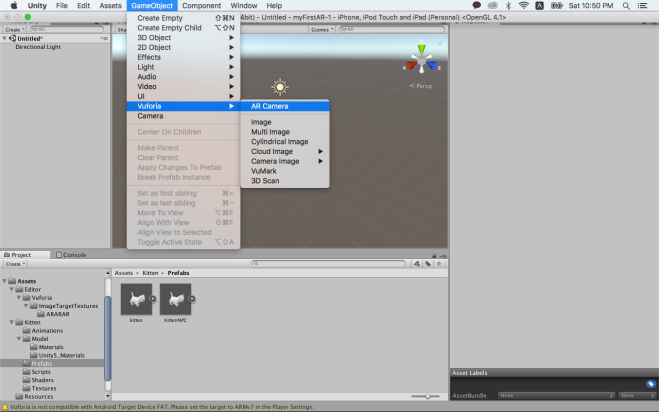
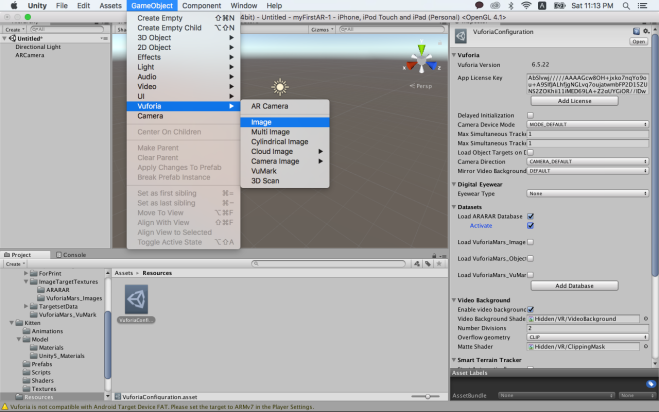
- Add AR Camera
– Delete “Main Camera” placed on the left tab of the application.
– Click GameObject → Vuforia → AR Camera and import it.
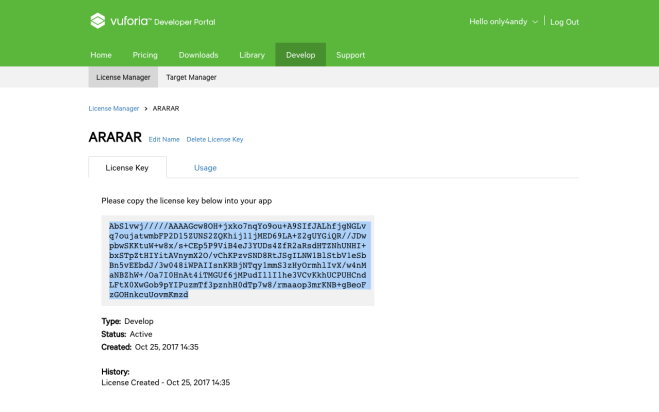
- Add Vuforia License
– Copy the License Key from Vuforia website under personal developer portal.
– Click ARCamera → Vuforia Behaviour → Open Vuforia Configuration.
– Paste the License Key into “App License Key” (No need to press “Add License”).


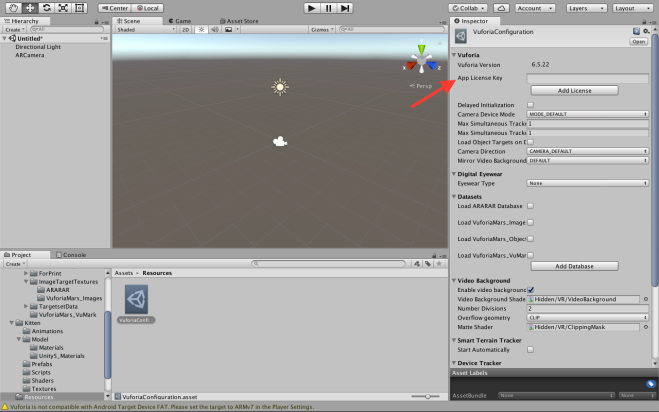

- Activate Datasets
– Do not forget to activate the dataset by checking the box “Load ARARAR Database” and “Activate” (In other cases, the name of the database will be different).

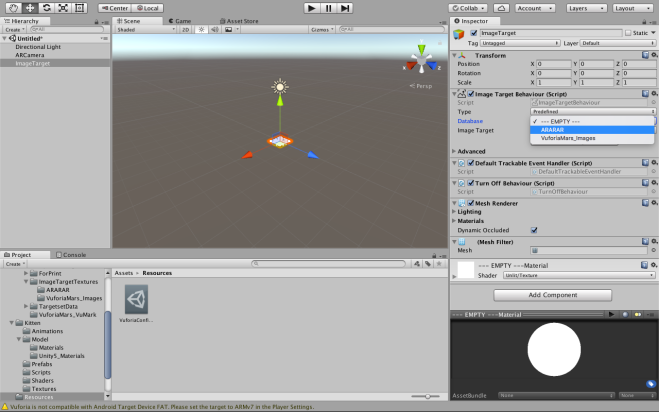
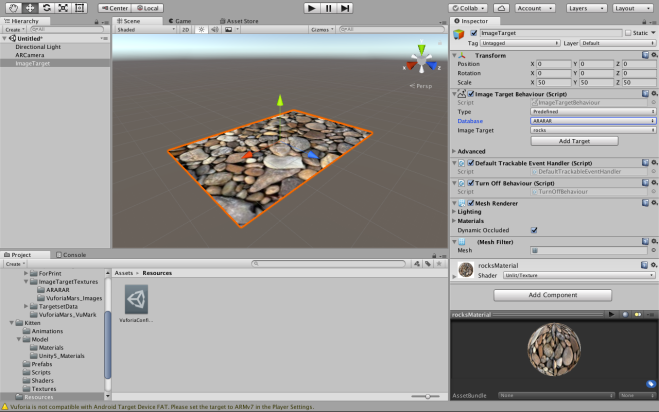
- Add Database Image
– Click GameObject → Vuforia → Image.
– From the tab on the right, select the correct database (It is ARARAR in this case, but can be different for others).
– Check if the image created is the same as the one you uploaded onto Vuforia.
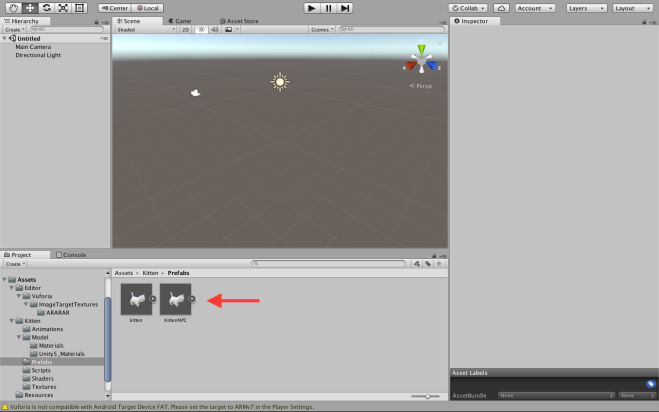
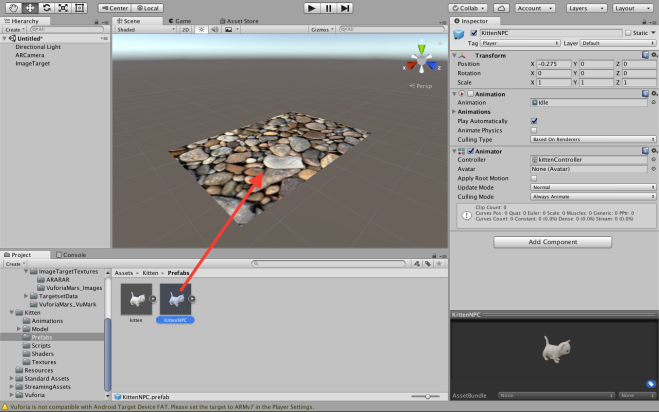
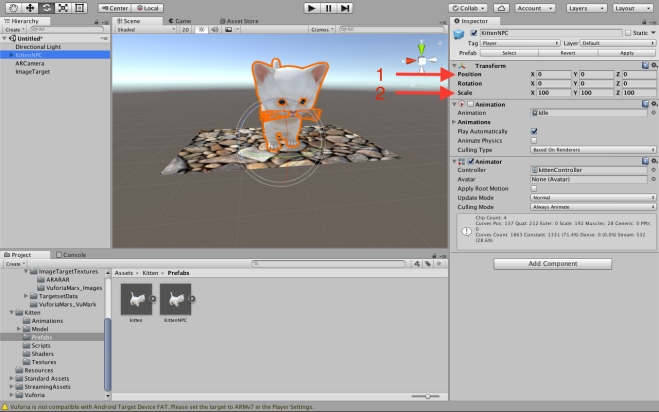
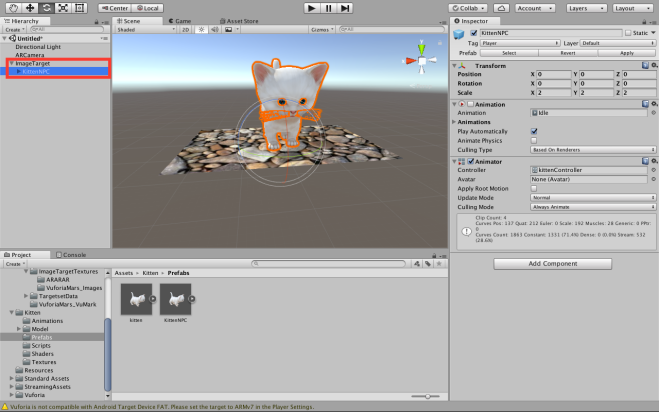
- Add 3D Model
– Drag “KittenNPC”, which is under Assets → Kitten → Prefabs, onto the image.
– Set the x-y-z position as 0-0-0.
– Make sure to enlarge the model to your preference by using the toggles / scale.
– Also, check the left tab and place the “KittenNPC” under “Image Target”.
- Play AR
– Click on the play button and see what you get when you place the image in front of your camera!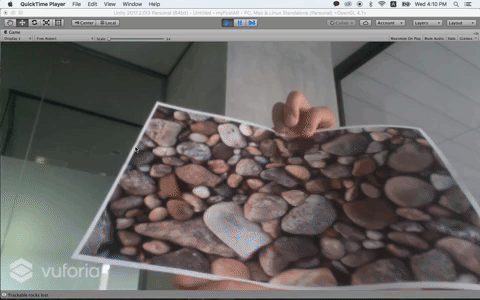
The above is what you should be getting!
It will probably take some practice to get everything perfect at once, but it really is worth a try. Since it was my first time making an AR, I had a few obstacles I had to overcome but it was really satisfying in the end!
This was it for Week 7! 🙂
